We have all heard of the advantage of the pair of bishops. Indeed, the two bishops are a formidable force, able to control squares of both colours, thus not allowing any hiding place for the opponent’s pieces.
The bishops are particularly potent in open positions, where they can roam free and attack everything in sight.
But we have also heard that there are no fixed rules in chess. Sometimes, in open positions the bishops cannot do much.
Take a look at the following position. It is from the game Carlsen-Anand, played in Dortmund in 2007.
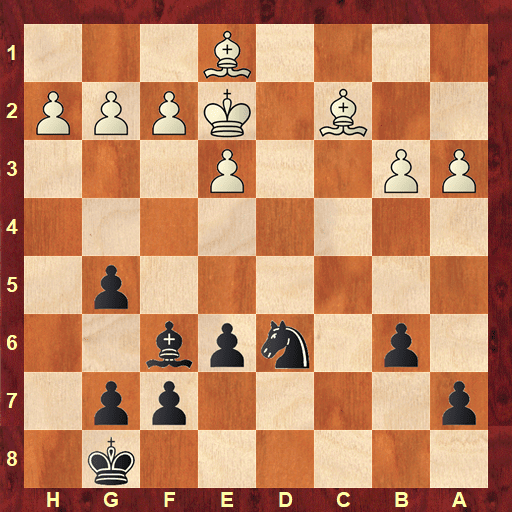
The position is symmetrical, but still open, so one would expect the bishops to dominate. In the hands of an endgame virtuoso like Carlsen, it would appear that the game is practically won!
And yet, what would you say if I told you that this is a dead draw? In fact, Black’s position is a fortress!
You don’t believe me? Well, let’s check how the game progressed. Black brought the king to e7, sent the bishop to b2 to attack the pawn on a3 and force a4 and placed the pawns on f6 and e5.
Still unconvinced?
That’s good, because you probably saw that White can open the position even further by pushing f4. That would surely increase the scope of the bishops and allow White to probe for weaknesses.
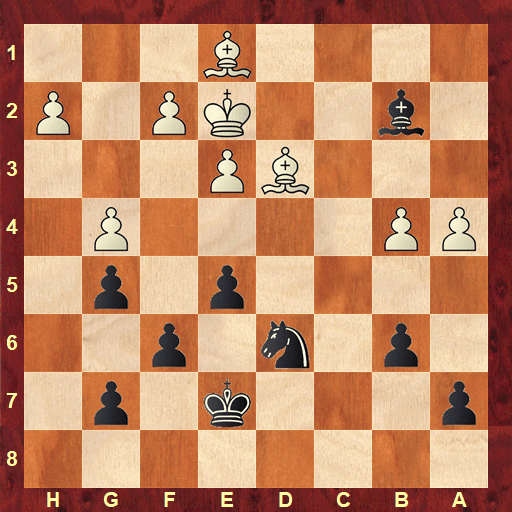
This is exactly what Carlsen did. After some preparation, he pushed f4 and the pawns were exchanged on that square. Then they reached the following position.
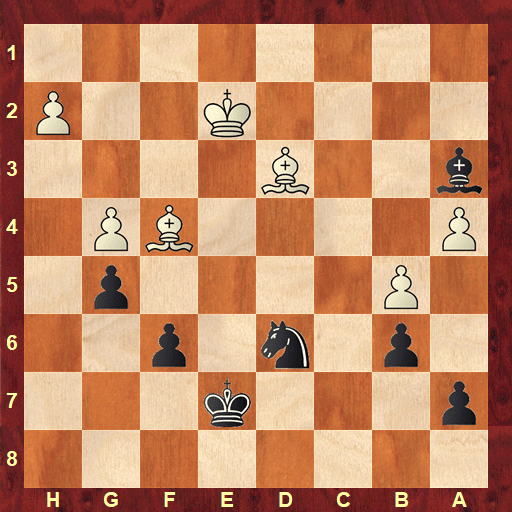
White achieved his aim and now he should use the power of the bishops, right?
Let’s see what can be done. In case of 39.Be3 Bc5! Observe how Black controls all the squares on the fourth rank, from f4 to b4, making it impossible for the white king to approach. This is not changed if White takes on c5 as then the b-pawn takes over the task of controlling the d4 and b4 squares. A fortress!
Realising this, Carlsen simply took on d6 and a draw was agreed upon.
A very instructive example that shows us the importance of understanding where the pieces belong, which squares are best for them. Anand understood that the knight on d6 was on its ideal spot, controlling the light squares e4 and c4 and only needed to be complemented by the pawns (or the bishop) to cover the remaining squares on the fourth rank. This setup created a fortress that even the powerful bishops couldn’t bring down.